Logo
  • About_this_kit
  • Board_Assembly
  • Arduino IDE
  • Upload Code
    • ESP32 DEVKIT V1_Blink
    • ESP32_S3 Board_Blink
  • Pinout
ESP32-Breakout
  • Upload Code
  • ESP32_S3 Board_Blink
  • View page source

ESP32_S3 Board_Blink

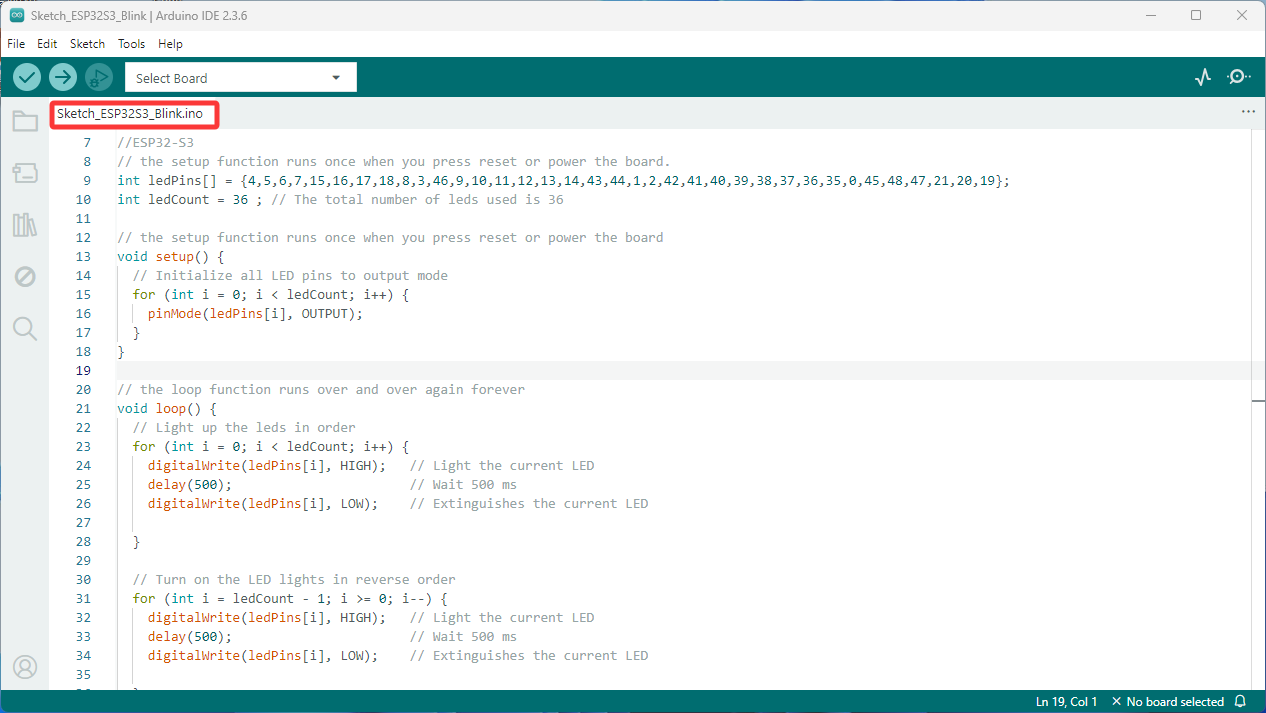
①Start Arduino IDE,open the code in File->Open…->Breakout Board for ESP32 ESP32S3>Sketch>Sketch_ESP32S3_Blink>Sketch_ESP32S3_Blink
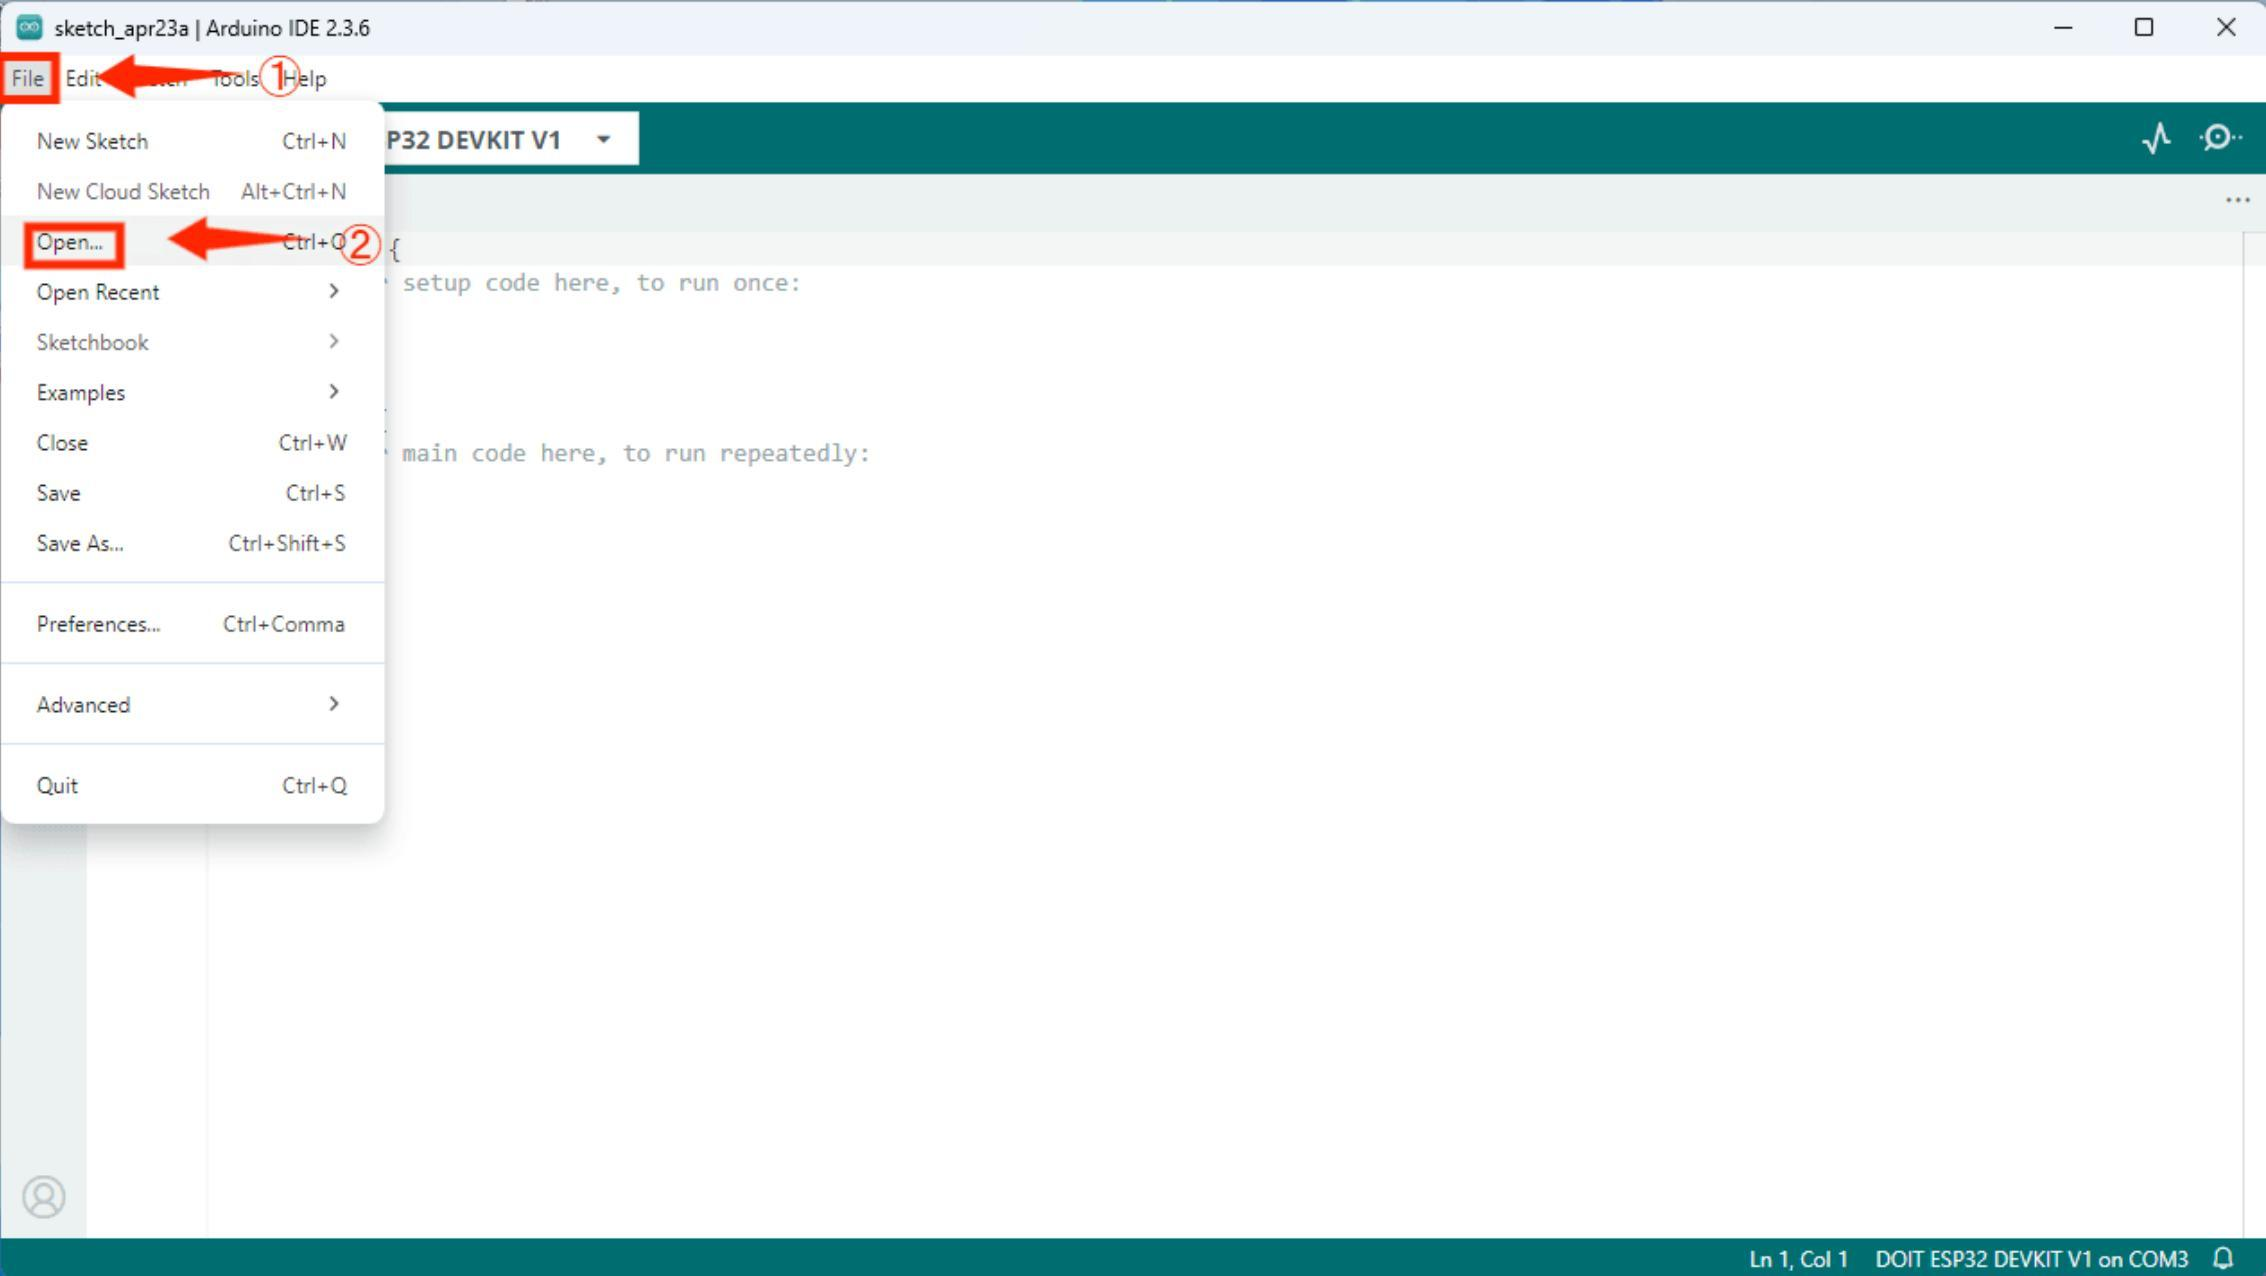
../_images/S3%E7%A8%8B%E5%BA%8F%E6%89%93%E5%BC%80.png ../_images/S3%E7%A8%8B%E5%BA%8F%E8%B7%AF%E5%BE%84.png ../_images/S3%E7%A8%8B%E5%BA%8F.png

②Use USB cable to connect the ESP32_s3 board to the computer.

Tutorial/img/S3供电.png

③Select your Board in Tools >Board menu >esp32 >ESP3_S3 DEV Module

../_images/S3%E6%9D%BF%E5%AD%90%E9%80%89%E6%8B%A9.png

④ Select the Port (if you don’t see the COM Port in your Arduino IDE, you need to Install CH343 drivers windows

../_images/S3%E7%AB%AF%E5%AD%90%E9%80%89%E6%8B%A9.png

⑤Click the Upload button to your board.

../_images/%E4%B8%8B%E8%BD%BD%E9%94%AE.png

in the Arduino IDE.Wait a few seconds while the code compile sand up loads
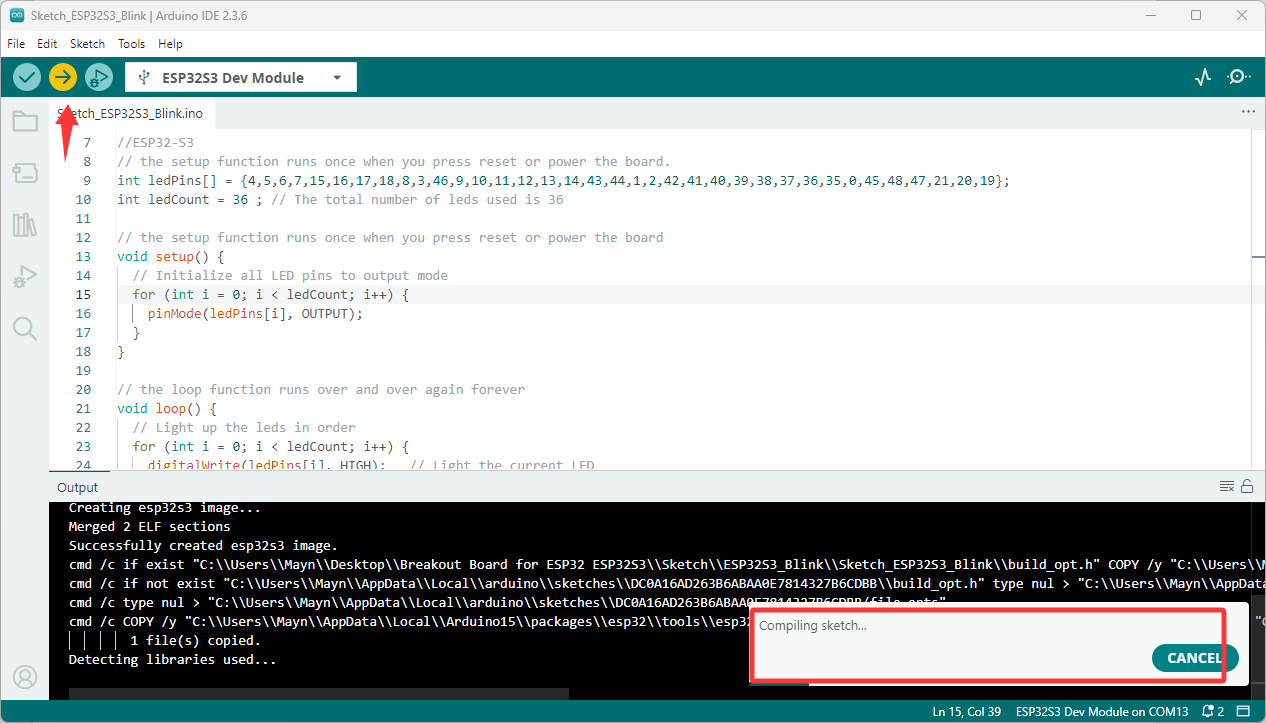
../_images/S3%E7%A8%8B%E5%BA%8F%E4%B8%8B%E8%BD%BD.png

If everything went as expected,you should see a “Done uploading.”message.If the ArduinoID Ereports errors may be you missed some steps. Arduino getting started guideis as follows

Errors when uploading a sketch

Getting Started with Arduino products
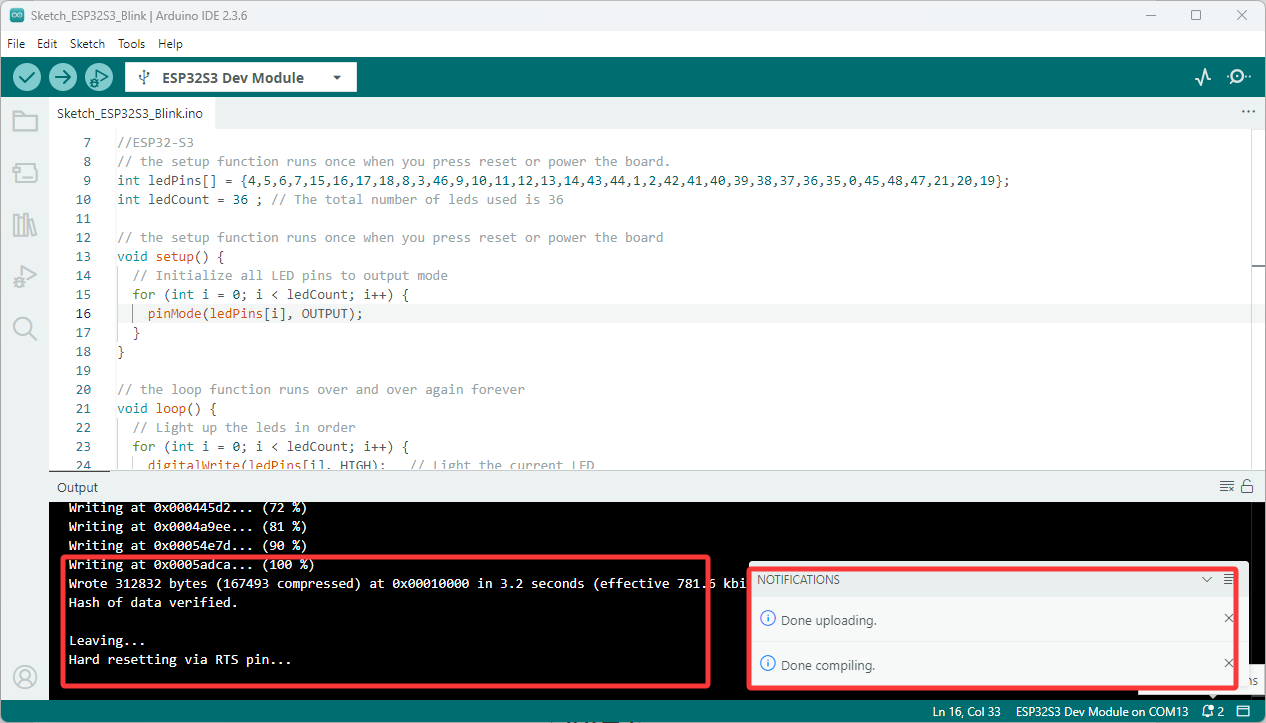
../_images/S3%E7%A8%8B%E5%BA%8F%E4%B8%8B%E8%BD%BD%E6%88%90%E5%8A%9F.png
Previous Next

© Copyright 2026, Lafvin.

Built with Sphinx using a theme provided by Read the Docs.